If you've by mistake went down your iPhone and broke the monitor, don't overreact! Switching out an iPhone display screen is less complicated than you may presume. Along with the ideal tools and a little determination, you may possess your iPhone looking as excellent as new in no opportunity. In this step-by-step resource, we'll stroll you with the method of replacing your iPhone screen in 10 minutes or a lot less.
Before we start, it's vital to note that this overview administers to a lot of iPhone versions, consisting of the more recent ones like the iPhone X and XS. Nonetheless, if you're not sure about whether this manual is suited for your particular version, it's always a really good suggestion to check along with Apple or consult a expert.
Without further trouble, allow's get began!
Measure 1: Gather the necessary devices
To switch out your iPhone screen, you'll need a few devices:
1. Replacement screen set (create certain it's compatible with your specific design)
2. Screwdriver collection (featuring a pentalobe screwdriver)
3. Suction mug
4. Tweezers
5. Plastic pry device
You can easily effortlessly discover these devices online or at local electronics establishments.
Action 2: Electrical power off and get rid of SIM card
Prior to proceeding with any sort of repair service work on your iPhone, help make certain to power it off entirely. This will prevent any unintended damage while working on the unit.
In addition, clear away the SIM memory card tray utilizing a SIM memory card removal tool or a paperclip.
Step 3: Eliminate screws and screen installation
Using the pentalobe screwdriver, meticulously take out the two screws located at the bottom of your iPhone.
Next, use the suction cup to lift up the display screen assembly slightly. Placing a plastic pry resource between the structure and display assembly can help loosen up any adhesive holding them all together.
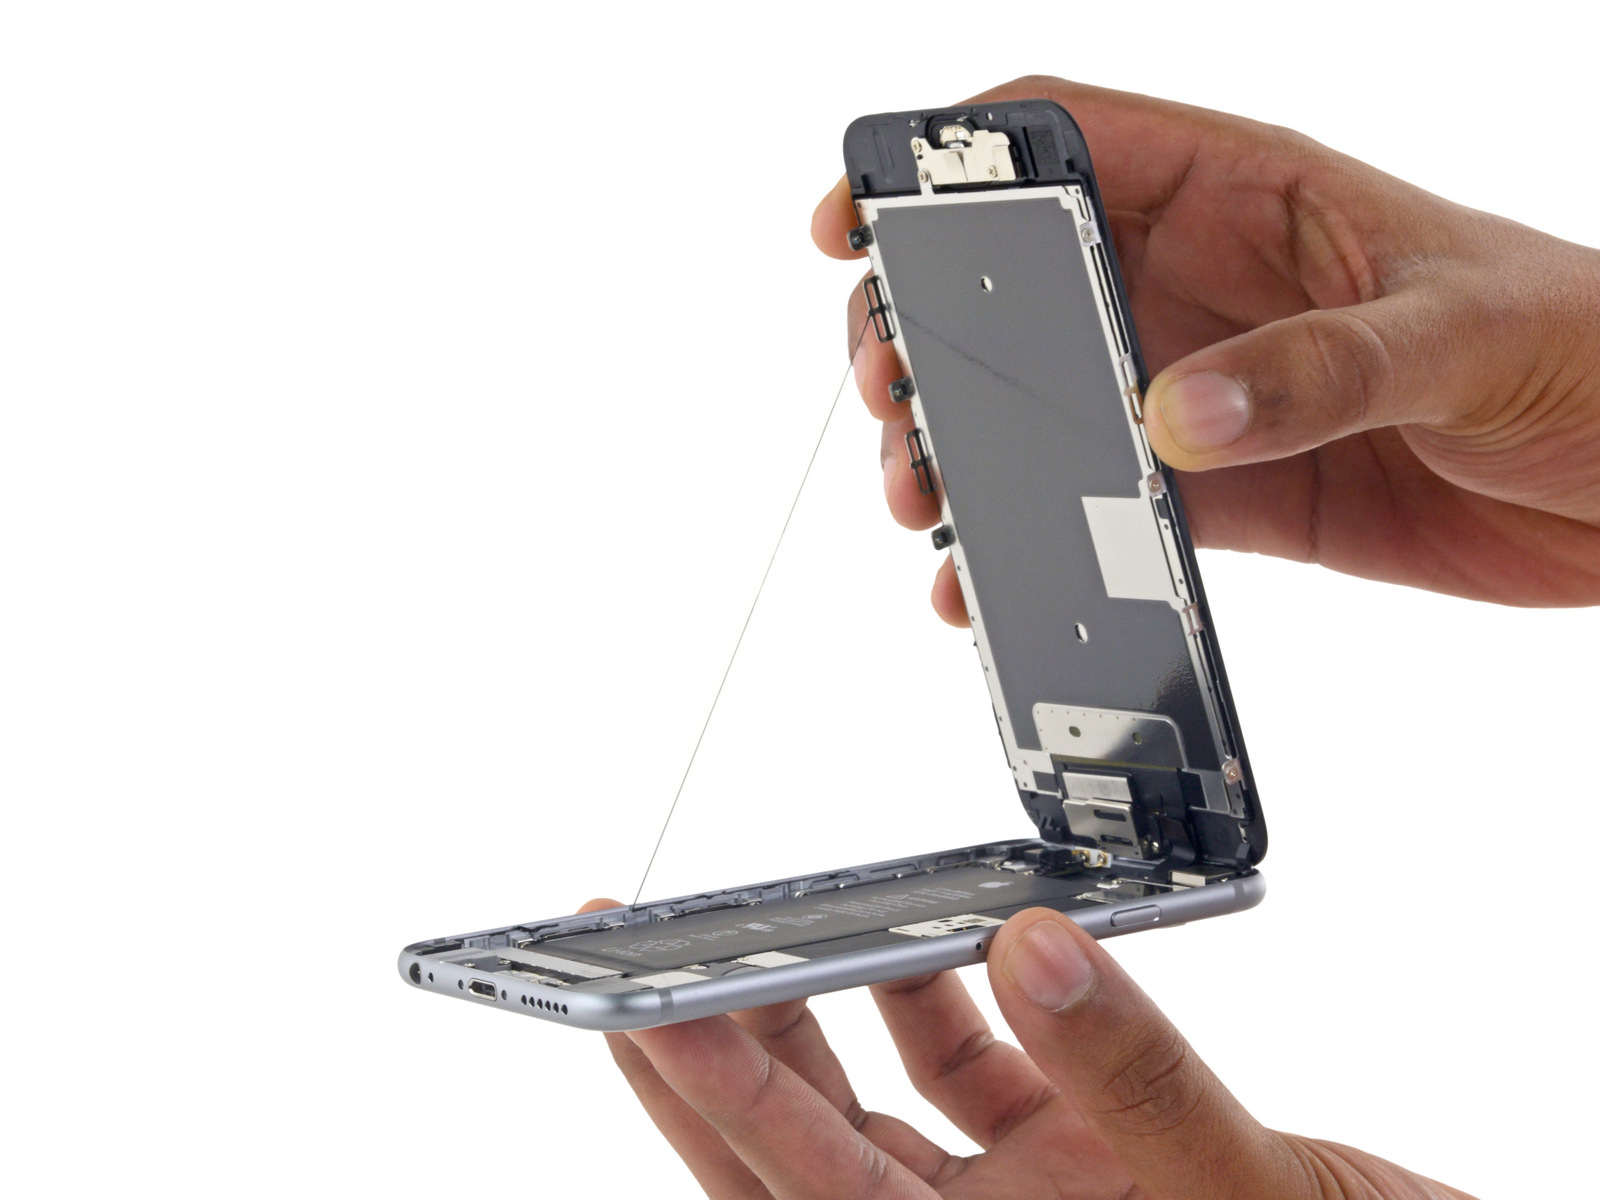
Delicately lift up on the display screen installation coming from each sides, turning it up coming from the bottom, and carefully take out it.
Action 4: Disconnect cable televisions and get rid of old display screen
Once the display setting up is gotten rid of, you'll require to detach three wires that are holding it in location. These cable televisions handle the touch display, display screen, and front electronic camera.
Using a tiny screwdriver or tweezers, meticulously detach these cables one through one.
After separating the cables, eliminate the outdated screen coming from your iPhone.
Step 5: Put up brand-new display
Take your replacement monitor package and meticulously straighten it along with the phone's structure. Make sure all connectors are correctly edged up along with their respective ports.
Delicately push down on the substitute display to get it in place.
You Can Try This Source : Reconnect cords and rebuild
Currently it's time to reconnect the three cords that were detached previously. Very carefully attach each cord back right into its particular slot.
Once all of the cable televisions are connected, lesser down the display setting up onto the structure. Make sure that it sits flush with no gaps.
Lastly, make use of your pentalobe screwdriver to return and tighten the two screws at the base of your iPhone.
Action 7: Power on and examine
Along with everything reassembled, electrical power on your iPhone to make sure that everything is working as expected. Examine both